
I'm a huge fan and user of Evernote, and lots of people ask me for tips on using it, so I'm starting a series of blog posts on Evernote Tips and Tricks to share some great tips and ideas for using Evernote.
Tip #8 - Checklists
One of the nice features in Evernote that I use constantly is checklists. Checklists are great for to-do lists, shopping lists, project management and more. They are simple to create and use.
To create a checklist, you can do two different things:
1. Click on the checklist box before typing. As you hit enter after each line, it will create the check box in front of each line.
2. Select your list and then click on the checklist box - this will add the check box to the front of each line item.

It's that simple.
When you click the box, it will put a check mark in the box. I often also highlight the text of that item and put a strikethrough the text to make it easier to see that it is done.
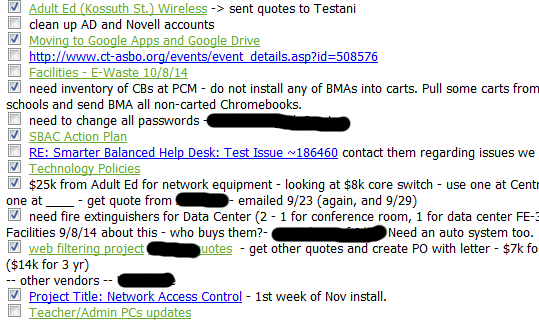
I keep my main task list clean by having each task a link to another note with the details. Here's an older checklist of mine as an example.
Create a checklist
Evernote for Mac, Windows desktop, iPhone, iPad, and iPod Touch:
1. Start editing your note.
2. Click or tap the ‘Insert checkbox’ button in the formatting bar, to add a checkbox.
Android:
1. In the note editor, swipe the bar above the keyboard to display formatting options.
2. Select the checkbox icon.
Power tip: On Evernote for Mac and Windows desktop, you can turn a list of items into a checklist. Simply highlight the list, then select the checkbox icon. Hitting Enter will add another checkbox to an existing list.
Related:
Evernote for Education Resources (includes more tips)
--