
Often enough organizations are collaborating and have the need to efficiently communicate regarding events and pertinent information. Sometimes sharing calendars is enough, however there are times when you would like one unified calendar. Here are few steps to get you started with creating a unified calendar.
Setting Up and Sharing

- Locate the + create a New Calendar and give it a name.
- After creating the calendar, click on the 3 dots and select Sharing and Settings
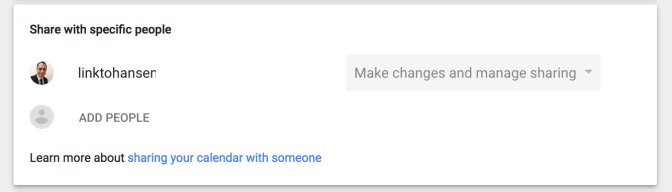
- When adding your key contributors, select the permissions Make Changes and Manage Sharing.
Exporting and Importing Existing
If you want to not have to re-create all your events from collaborators (already existing) calendars, you can export and import you calendars.
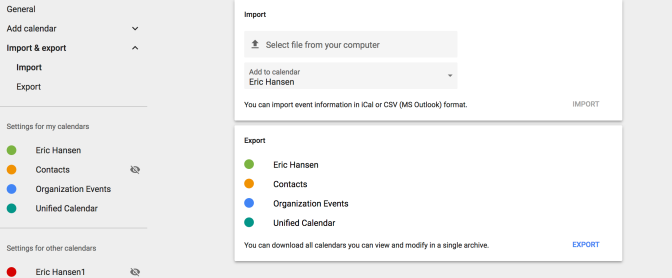
- On the top of your calendar select the settings button

- Locate the Import & Export section on the left (select export)
- Press the Export button (bottom right), this will create a zip folder to download to your computer with all of your calendars.
- Locate your zip folder on your computer and unzip the folder to extract all the files.
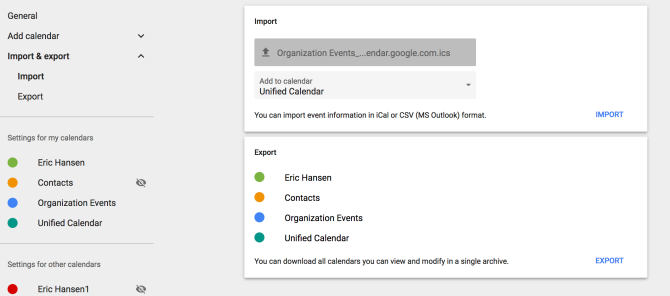
- Revisit Import & Export section select Import
- Upload your .ics file of the calendar you just exported.
- Select what calendar you want to import into (Example: Unified Calendar).
- Press Import
Moving Forward
At this point you have created a shared calendar for your joint organization to collaborate and add future events as well as learned how to export and import a calendar of current events (already made).

