Google Classroom makes it easy to assign individual work and whole-class assignments. But what about group work?
It takes a little bit more effort, but you CAN facilitate group work through Google Classroom.
Here's what I recommend.

2. Prepare your resources
For my project, two students will work together to research an injury to the human body and identify the proper treatment.I created a Google Doc with the requirements and guidelines for the project.

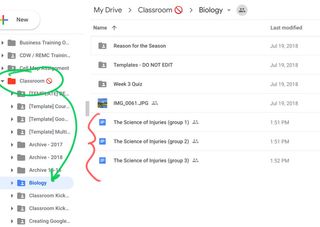
This is my file. It is organized in my class resources and templates. I use this file every year, so I don't want students editing my original.That's why step #3 is important.
3. Copy the resources for each group
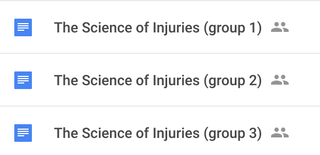
I make a copy of my template for each group. I have a smaller class so I only need three groups. I make a copy and rename the file for group 1, 2, 3, etc.

You will want to put these files somewhere you can easily find them. I usually stick them into the Drive folder that is linked to my class.

4. Create your assignment in Google Classroom
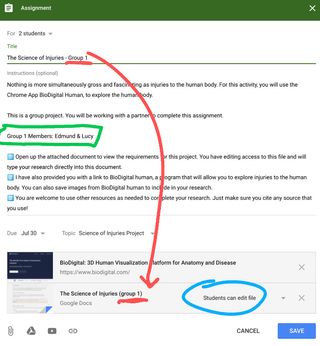
There are a few unique things that we are going to do with this assignment:
- Add "group 1" to the assignment title
- In the instructions, list the member of the group
- Attach the document for group 1 that we copied in step 3
- Make sure you chose the "students can edit" option for your resource
DON'T POST THE ASSIGNMENT...

[Six Ways to Use Google Photos in the Classroom]
5. Select your Group Members
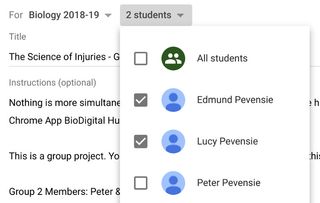
We only want the members of Group 1 to get this assignment.
Click the drop down for "students" at the top of your assignment and select the members of the group.

Now you can click the assign button!
6. Copy the assignment for groups 2, 3, 4, etc
Now we need to send the assignment to the rest of the groups.
This is the easy part!

Don't forget:
- Change the title of the assignment to include "group 2..."
- List the members of group #2
- Remove the Group 1 document and replace it with the group 2 document
Repeat for the remainder of your group!
The end result is a nice list of the assignment for each of your groups!

7. Monitor your groups
Each student will only be able to see the documents assigned to their group.
You (the teacher) will have access to all of the group documents.
Click on a group assignment to:
- Open their document and observe their progress
- Send private comments to everyone in the group or individuals in the group
- Enter grades for each member of the group
This is one of many different ways to organize group projects in Google Classroom. If you have suggestions or modifications for my process please leave a comment!
cross posted at electriceducator.blogspot.com
John Sowash creates useful resources for educators on his blog, The Electric Educator. John is the author of The Chromebook Classroom and founder of the Google Certification Academy. You can connect with John on Twitter (@jrsowash) and Instagram.

