Introducing Design Thinking to Elementary Learners
Design thinking is an approach to learning that includes considering real-world problems, research, analysis, conceiving original ideas, lots of experimentation, and sometimes building things by hand. The projects teach students how to make a stable product, use tools, think about the needs of another, solve challenges, overcome setbacks and stay motivated on a long-term problem. The projects also teach students to build on the ideas of others, vet sources, generate questions, deeply analyze topics, and think creatively and analytically. Many of those same qualities are goals of the Common Core State Standards. (What Does ‘Design Thinking’ Look Like in School?)
I use the following activities to introduce elementary students to the design thinking process. The ultimate goal is for the learners to work on their own, self-selected problems in which they will apply the design thinking.
Introducing the general design process to elementary student occurs through showing the following video about the engineering process:
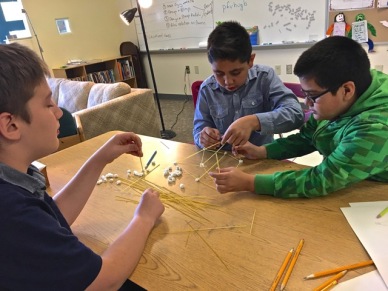
The Task: Build the Highest Tower
The Goal
The goal of this activity is to have learners practice a simple version of the engineering design process.
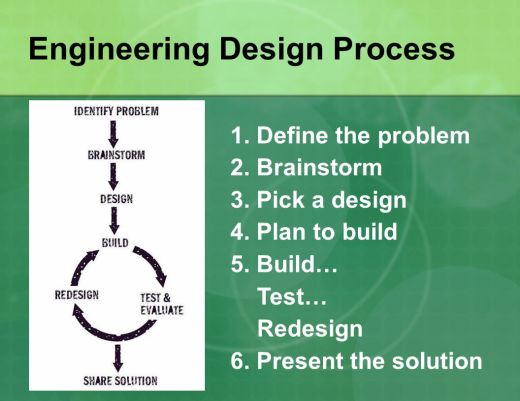
Source: http://slideplayer.com/slide/9058715/
The Task
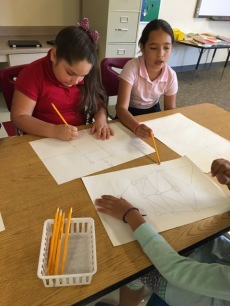
In teams of 3 to 4 members, learners are asked to build the highest tower out of 50 small marshmallows and 50 spaghetti noodles.
The Process
As a team, ask learners to sketch out possible solutions
Design thinking requires that no matter how obvious the solution may seem, many solutions be created for consideration. And created in a way that allows them to be judged equally as possible answers. Looking at a problem from more than one perspective always yields richer results. (Design thinking… what is that?)
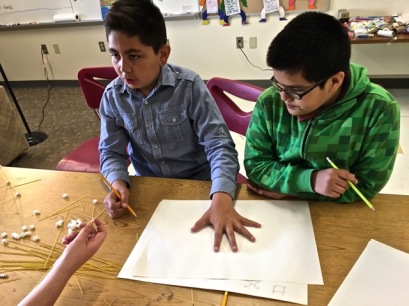
Prototype and test ideas
After brainstorming and sketching possible designs, learners begin the process of building this spaghetti-marshmallow towers.
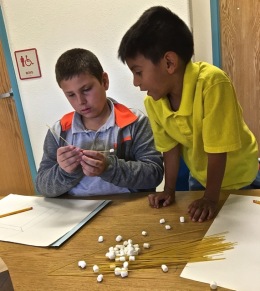
Revisit the design process
After some time prototyping, a time-out is called so learners can reflect on what is working and not working. Learners are encouraged to see what the other groups have created to spark new ideas.
Design thinking allows their potential to be realized by creating an environment conducive to growth and experimentation, and the making of mistakes in order to achieve out of the ordinary results. At this stage many times options will need to be combined and smaller ideas integrated into the selected schemes that make it through. (Design thinking… what is that?)
Return to the building and testing process
Next Step: Introduction to Empathy
As a design thinker, the problems you are trying to solve are rarely your own—they are those of a particular group of people; in order to design for them, you must gain empathy for who they are and what is important to them. As a design thinker, the problems you are trying to solve are rarely your own—they are those of a particular group of people; in order to design for them, you must gain empathy for who they are and what is important to them. (from the d-school)
The second part of the introducing elementary-level learners to the design process is introducing them to empathy and its connection to the design process.
The Goal
To have learners discover and explore the elements of empathy as it relates to design.
The Process
Introduction to Empathy
For younger kids (but even the 5th and 6th graders seemed to enjoy it):
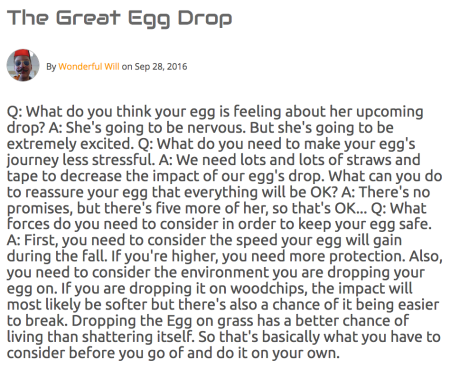
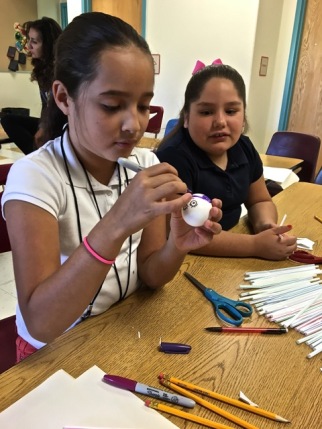
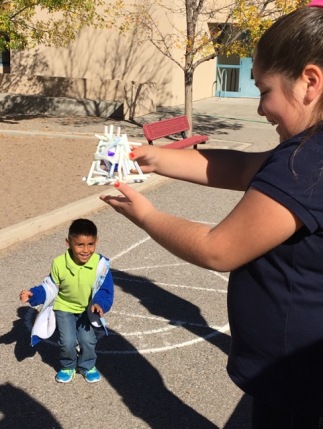
Warm-Up: Great Egg Drop
Preparation and introduction:
Learners are asked to draw a face on an egg and are given the following directions: “Pretend the egg is alive – has thoughts, feelings, and opinions. Your job is to use the straws to create a protective covering for the egg so it will not crack when dropped from a 10 foot height. Address the following questions prior to building your egg structure:
- What do you think your egg is feeling about his or her upcoming drop?
- What do you need to make your egg’s journey less stressful?
- What can you do to reassure your egg that everything will work out okay?
- What forces do you need to consider in order to keep your egg safe? Consider gravity, rate of descent, impact.
Example Responses from a 6th grade group:
The Task
To begin, assemble groups of 4 or 5 and give each group various materials for building (e.g. 5-20 straws, a roll of masking tape, one fresh egg, newspaper, etc.) Instruct the participants and give them a set amount of time (e.g. 30 minutes) to complete building a structure, with the egg inside in which the structures are dropped from at least 10 feet in elevation and then inspected to see if the eggs survived. The winners are the groups that were successful in protecting the egg. (http://www.icebreakers.ws/medium-group/defend-the-egg.html)
Delving Deeper: An Environment for a Gamibot
Lead learners through the following steps:
- Create a Gamibot – http://www.howtoons.com/?page_id=3475. With available art materials, decorate the Gamibot.
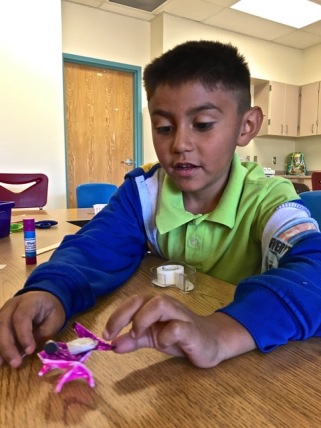
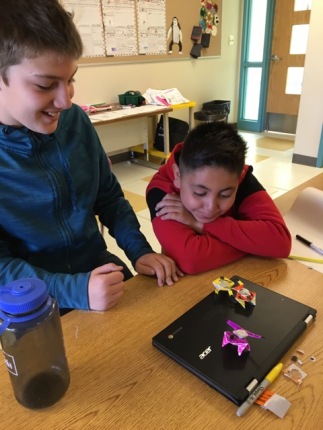
- Develop the Backstory for the Gamibot: Report via a Blog Post or Voki
- Create an Environment for the Gamibot Out of Natural and Art Materials. Make sure it fits your Gamibot’s backstory creating an environment that is tailored for your Gamibot. Be ready to explain why it fits your Gamibot.
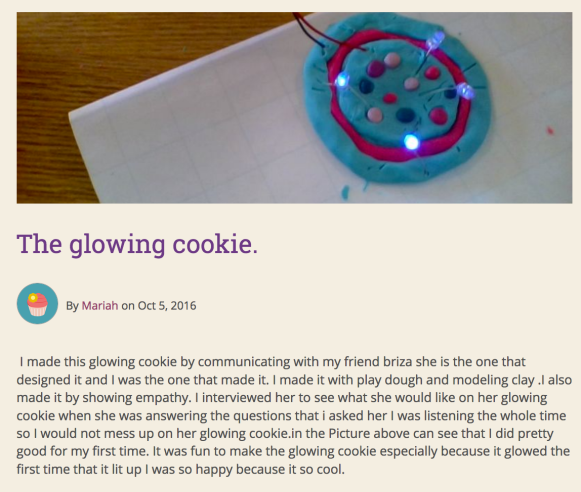
Squishy Circuits: Designing for a Human Being
The Goal
To put everything together by creating a design for another human being.
The Task
Learners design a squishy circuit product based on the specifications given to them by a classmate – the client from all of the available colors of Play-Doh (conductive clay), modeling clay (insulating clay), and LED lights.
The Process
Lead learners through the following steps:
- Learn about and experiment with Squishy Circuits (for how to do it, see http://www.makereducation.com/squishy-circuits.html)

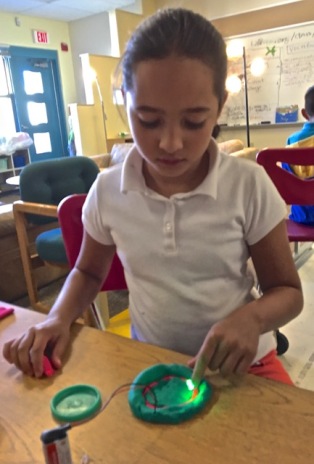
- As partners, decide who will be the designer and who will have a product designed for him or her – the client.
- As a designer, find out the following from the client:
- What do you want me to build?
- What size do you want it to be? It needs to be scaled in some way. (Note: learners are given graph flip chart paper with 1″ squares and taught about scale, e.g., 1″ = 1′, 1″ = 2′, etc.)
- What color Play-Doh? Modeling clay? LED lights.
- Construct the design while your client gives you feedback. The client is not permitted to touch the Squishy Circuit during the design process.
- After completion, roles are switched.


Lots of information and links. Definitely could be incorporated into Project Based Learning.
Susan Walker
October 4, 2016 at 7:49 pm
I LOVE the idea of connecting empathy to engineering process – yes please! It often feels like many adult engineers missed that connection in their education 🙂
Amanda
October 11, 2016 at 11:40 pm
I am excited about learning more about teaching design thinking to kids, or to teachers that teach kids. Does anybody know of an association working on these things already in Switzerland? I am based near Geneva and Lausanne.
Mary Jean Bürer
August 29, 2018 at 12:33 pm