by: Tom Daccord
A screencast is typically a short video recording of something transpiring on a computer screen or a mobile-device screen. It frequently includes audio narration and may also include text, music, images, and graphics.
Screencasting can be helpful in nearly every curriculum and grade level as a useful means of providing opportunities for both teachers and students to communicate and share what they know, think, feel, and understand. Moreover, its video qualities engage a wide range of learners and the video can be paused and replayed to increase understanding and retention. Screencast videos can be uploaded to Google Classroom for distribution, or to any number of websites for viewing.
With school buildings now closed, screencasting is a great means of visually communicating content and ideas asynchronously. For instance, a teacher might create a screencast that includes verbal narration of PowerPoint slides or Google slides that otherwise would have been presented in class. (Many screencasting tools also enable teachers to ink or annotate over what they are showing.) Teachers might also create a screencast to explain to students and parents assignments they expect the students to complete. Teachers can also provide with visual and auditory explanations of pages, notes, photos, graphics, charts, and more. And teachers can provide students with feedback on their work.
As for students, they can explain what they are thinking as they solve a math problem, draw a picture, write a story, or analyze a graph. Students can reflect and comment on ANY content on their screen: Instructor-created slideshows, handwritten or typed notes, photos, drawings, diagrams, graphs, charts, and more. Teachers can then reflect on student learning: What do they understand? What are they missing? Where do they need more help? What type of help should I provide?
Here are three recommended screencasting tools for beginners:
Screencastify
Available in the Chrome Web Store
Device: Computer or Chromebook with Google Chrome & Drive
Pricing: Freemium

Description:
- Google Chrome Extension.
- Record your whole desktop, just one tab, or use the webcam to create a video.
- Saves to Google Drive.
- Videos can be easily embedded into a Google Slideshow.
- Free Version
- 5 minute video length limit
- Share to Google Classroom
- Annotation Tools
- Paid Version – $29/year
- Unlimited recording length
- Share to Google Classroom
- Crop your recordings
- Add text over clips
Tutorial: View a Screencastify tutorial by EdTechTeacher
Screen Recorder on iPad
Device: iPad
Pricing: Free
Description:
- Available with iOS 11 and later
- A built-in feature of the iPad with the release of iOS 11 in fall of 2017.
- Records all activity on the iPad screen
- Narration possible – once microphone is activated
- Saves to the Photos or Camera Roll
- Can be exported to Google Drive or other cloud locations
Enabling iOS Screen Recording:
Settings – Control Center – Customize Controls – Turn on Screen Recording

Tutorial: View a Screen Recording Tool on iPad tutorial by EdTechTeacher.
QuickTime
Device: Macbook
Pricing: Free with a Macbook
Description:
In the QuickTime Player app on your Mac, choose File > New Screen Recording. The Screen Recording window with the Record button at the bottom and the Options pop-up menu next to it. Click the Options pop-up menu, then choose any of the following recording options:
- Choose Show Mouse Clicks in Recording so that clicks you make during the screen recording appear as a circle in the video.
- Click the Record button , then choose a recording type.
- Click once anywhere on the screen to start recording the entire screen.
- Drag to select a portion of the screen to record, then click Start Recording. For example, you can drag to select just a specific window.
When you’re finished recording, click Stop in the menu bar (or use the Touch Bar). Choose File > Save, then enter a name for the recording. The recording is saved as an H.264 format QuickTime movie with an AAC audio track (if audio was selected).
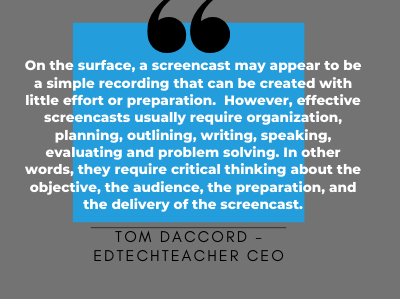
On the surface, a screencast may appear to be a simple recording that can be created with little effort or preparation. However, effective screencasts usually require organization, planning, outlining, writing, speaking, evaluating and problem solving. In other words, they require critical thinking about the objective, the audience, the preparation, and the delivery of the screencast.
Here are some guidelines to consider when creating a screencast:
- Keep it short, no more than five minutes.
- Longer lessons can be divided into small chunks.
- Explain the objective of the screencast and essential questions students should be able to answer after viewing the video.
- Use breakpoints, or pauses, throughout the video to help students focus and reflect.
For additional ideas on using Screencasting to help students learn and connect with parents please explore the articles below. These articles discuss screencasting from a computer, but many of the ideas can be transferred to the iPad.
- 5 Ways to Use Screencasting to Build Stronger Home-School Connections
- 5 Ways that Screencasting Improves Teaching & Learning – an Interview with Avra Robinson & James Daley
Upcoming Webinar
EdTechTeacher is running a free webinar on March 19th at 9AM EST on Creating Screencasts to Support Remote Learning.


